Administrator tools #
Creating reports #
This section shows how to create reports.
As an example, we will create the Health Department report that shows how many requests were closed for the current month.
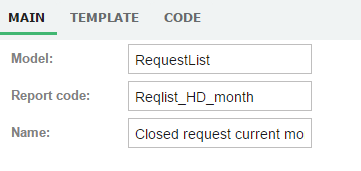
First, we need to go to Reports panel(Administrator->UI->Reports) and create a new one.
NOTE
❗ In the Model field use the name of the directory that you have created in models directory(models/_your_module_name_).
NOTE
❗ Save the report before continuing.
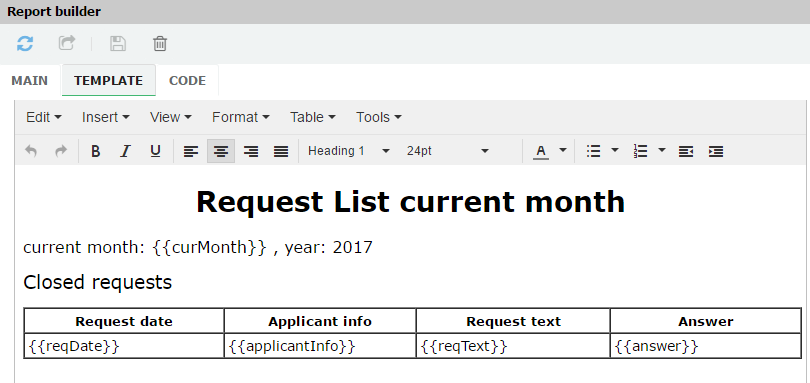
The TEMPLATE section allows to create template of your report using Mustache.
It works by expanding tags in a template using values provided in a hash or object.
Mustache is a logic-less template syntax. It can be used for HTML, config files, source code - anything.
It works by expanding tags in a template using values provided in a hash or object.
You can find more info about it on:
Use the editor to build a template such this:
As a result, you should get the code(Tools / Source code) something like this:
<h1 style="text-align: center;">Request List current month</h1>
<p><span style="font-size: 12pt;">current month: {{curMonth}} , year: 2017</span></p>
<p><span style="font-size: 14pt;">Closed requests</span></p>
<table style="word-break: break-all; width: 779px;" border="1px" width="779px" cellspacing="0" cellpadding="3px">
<tbody>
<tr>
<td style="width: 808px; cursor: w-resize; text-align: center;"><strong><span style="font-size: 10pt;">Request date</span></strong></td>
<td style="width: 772px; cursor: default; text-align: center;"><strong><span style="font-size: 10pt;">Applicant info</span></strong></td>
<td style="width: 772px; cursor: default; text-align: center;"><strong><span style="font-size: 10pt;">Request text</span></strong></td>
<td style="width: 760px; cursor: default; text-align: center;"><strong><span style="font-size: 10pt;">Answer</span></strong></td>
</tr>
<!--{{#req_reqList}}-->
<tr>
<td class=" tinymce_templated_td" style="width: 808px; cursor: w-resize;">{{reqDate}}</td>
<td style="width: 772px;">{{applicantInfo}}</td>
<td style="width: 772px;">{{reqText}}</td>
<td style="width: 760px; cursor: w-resize;">{{answer}}</td>
</tr>
<!--{{/req_reqList}}-->
</tbody>
</table>
NOTE
❗ Save the report before continuing.
In the CODE section, you need to describe how the template gets the data and what it does with it.
To get data for the report we need to use the ClientRepository.
ClientRepository - Repository for client-side data retrieve.
The following code lets us do what we want. Add it to the CODE section.
exports.reportCode = {
buildReport: function(reportParams){
  var me = this

  var today = new Date(),
  curMonth = today.getMonth();
  var mBegin = new Date(today.getFullYear(), today.getMonth(), 1) //Get first date of current month
  var mEnd = new Date(today.getFullYear(), today.getMonth()+1, 1) //Get first date of next month

  return UB.Repository('req_reqList')
    .attrs(['reqDate', 'applicantInfo', 'reqText','answer','status'])
	.where('department','equal', YOUR_DEPARTMENT_ID) //Set your departments ID from Departmments form!!!
    .where('status', 'equal', 'CLOSED') //get closed requests
    .where('reqDate', '>=', mBegin) //get requests in current month
    .where('reqDate', '<', mEnd)
  	.selectAsObject()
    .then( function (resp) {
	  var data = {
		req_reqList: resp,
                curMonth: curMonth + 1
      }
      var result = me.buildHTML(data);
       if (me.reportType === 'pdf') {
          result = me.transformToPdf(result);
      }
      return result;
    })
}
};
NOTE
❗ Don't forget to set your Department ID from the Departments form.
NOTE
❗ Save the report before continuing.
Now, the report is ready. You can preview it in different formats by pressing on the Test button with the corresponding format.
Templates and their code are stored in models/YOUR_MODEL_NAME/public/reports directory.
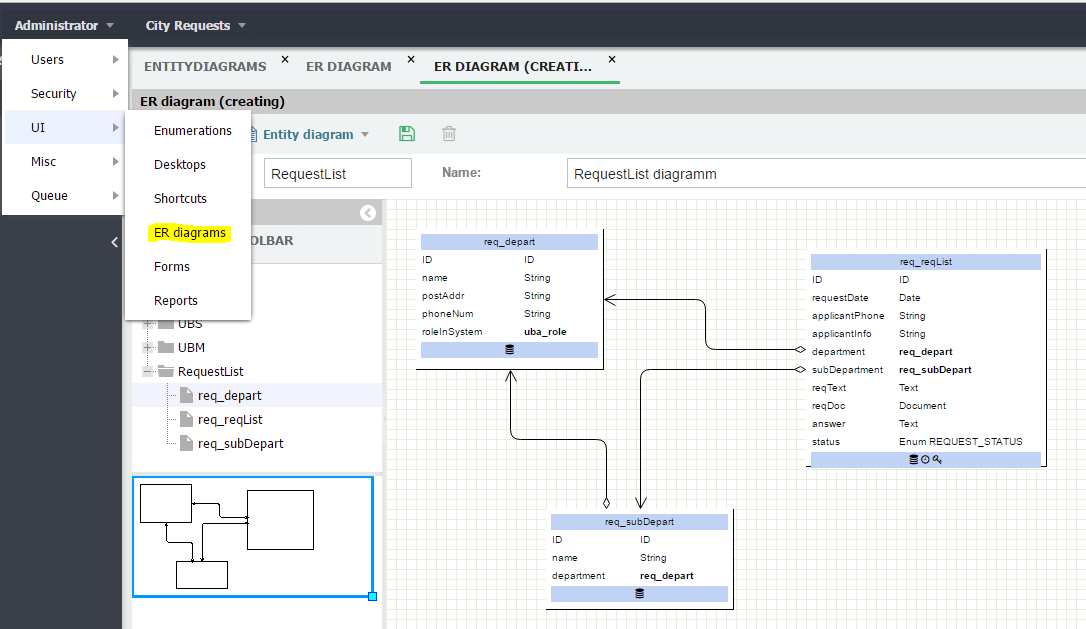
Creating entity diagrams #
To display links between entities of the model we can use Diagram tools from the Administrator->UI->ER diagrams menu:
Audit #
Audit of occurring processes in the system can be performed on the Security page:

On the Audit item, you can perform a customized action search, and on the Security audit page, all processes are listed as a list.
Try to find all updates made by the admin user during this week in the request's model.