Creating custom forms #
Based on the test model CityPortal you can create several forms with a customizable interface and behavior.
The UB client application is implemented on the Sencha Ext.JS platform.
General documentation on forms and their properties
http://docs.sencha.com/extjs/4.2.2/#!/guide/forms
Element positioning on a form #
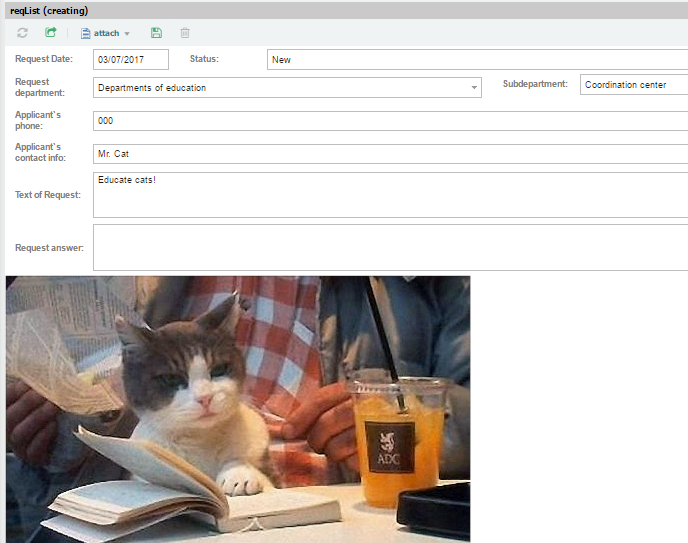
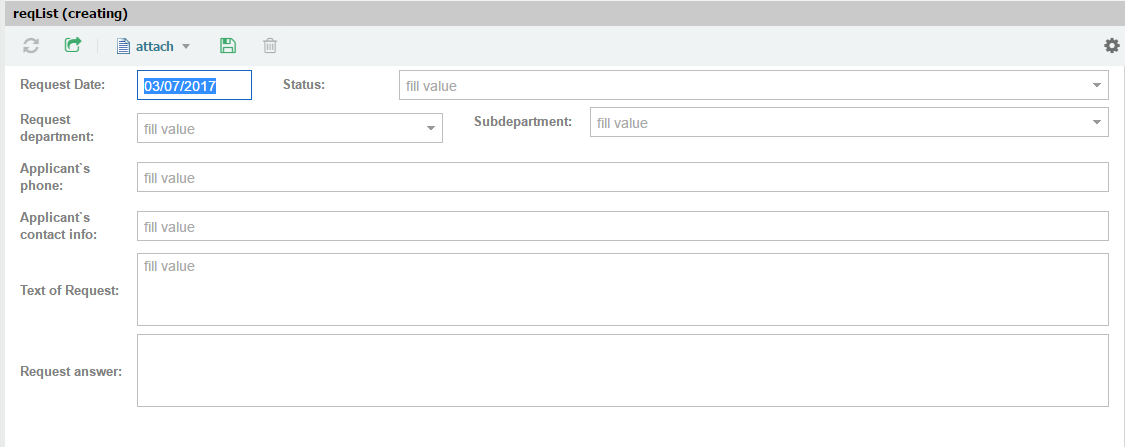
Let's create the RequestList form shown in the figure below.
Add a new form to the menu Administrator -> UI ->Forms
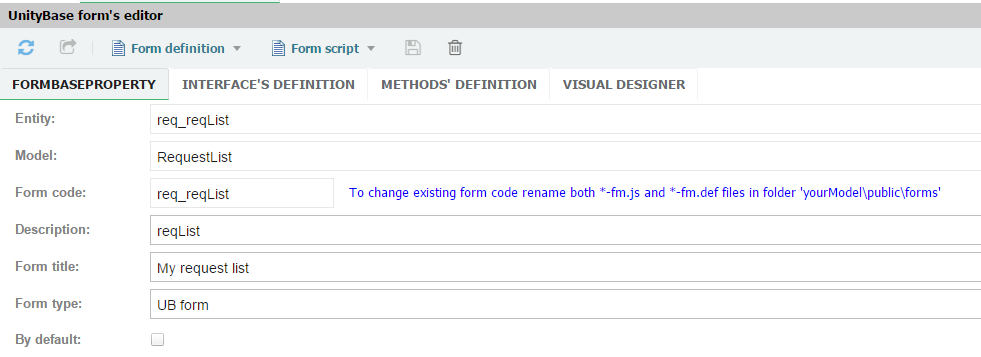
❗ In the Model field use the name of the directory that you have created in models directory(models/_your_module_name_).
❗ After entering the basic properties, be sure to save the form with the button in the top toolbar.
Here you can describe the two types of forms - Pure ExtJS Form and UB Form.
The first one is based on the ExtJs Ext.define base class. All properties and methods of this form are described in the INTERFACES DEFINITION section.
UB Form is inherited from Ext.define and is described in two sections - INTERFACES DEFINITION (setting and location of elements) and METHODS DEFINITION (behavior, events)
The INTERFACE'S DEFINITION section encodes the form interface.
Open the Interface's definition section and enter the following code:
//@! "do not remove comments below unless you know what you do!"
//@isDefault "false"
//@entity "req_reqList"
//@formType "auto"
//@caption "My request list"
//@description "reqList"
exports.formDef = {
  parentConfig: {
    layout: {
      type: "vbox",
      align: 'stretch'
    }
  },
  items: [
    {
      layout: {
        type: 'hbox' //Horizontal positioning of elements
      },
      items: [
        {
          attributeName: "reqDate", // Request Date
          flex: 1                   // Proportional width of the element
        },
        {
          attributeName: "status",
          flex:3
        }
      ]
    },
    {
      layout: {
        type: 'hbox' //  Horizontal positioning of elements
      },
      items: [
        {
          attributeName: "department" ,/*Request department*/
          flex: 2 // Proportional width of the element
        },
        {
          attributeName: "subDepartment", /* Subdepartment */
          flex:3
        }
      ]
    },
    { attributeName: "applicantPhone" /*Applicant`s phone*/},
    { attributeName: "applicantInfo" /*Applicant`s contact info*/},
    { attributeName: "reqText" /*Text of Request*/},
    { attributeName: "answer" /*Request answer*/}
  ]
};
As you can see from the code, the form has a common vbox with a vertical alignment of the fields, inside of which there are two hbox containers that place the fields horizontally with respect to each other.
You can view the form while editing in Visual Designer after saving the code.
Documentation by reference
http://docs.sencha.com/extjs/4.2.2/#!/api/Ext.layout.container.VBox
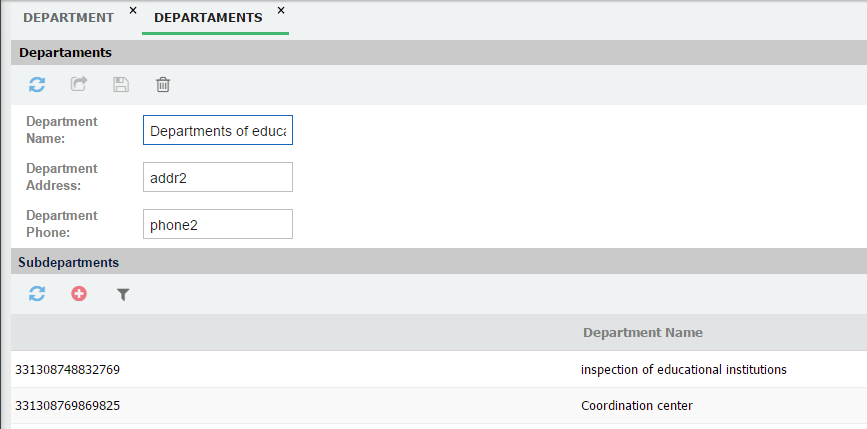
Creating a detail panel on a form #
In order to make editing of a specific Department and its Subdepartments more convinient, we can work with both in one window.
https://unitybase.info/api/adminUI/#!/api/UB.ux.UBDetailGrid
Add the new form
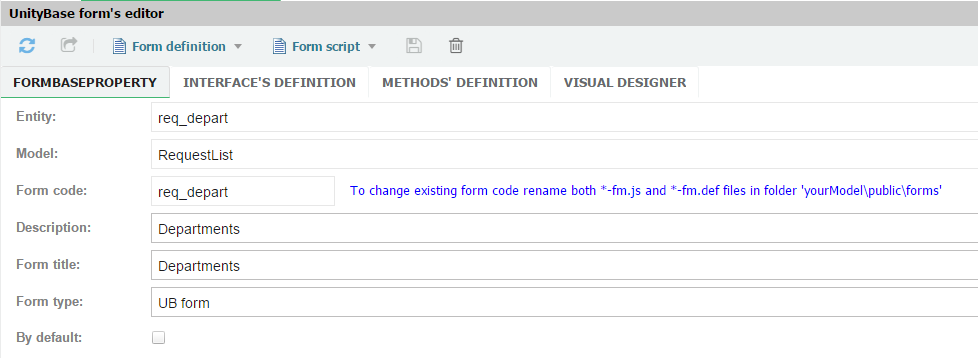
In INTERFACES DEFINITION add following code:
//@! "do not remove comments below unless you know what you do!"
//@isDefault "false"
//@entity "req_depart"
//@formType "auto"
//@caption "Deaprtments"
//@description "Departaments"
exports.formDef = {
  items: [
    { attributeName: 'name' /* Department Name */},
    { attributeName: 'postAddr' /* Department Address */},
    { attributeName: 'phoneNum' /* Department Phone */},

    // Detail grid SubDepartment
    {
      xtype: 'ubdetailgrid',
      title: 'Subdepartments',
      entityConfig: {
        entity: "req_subDepart", // Associated entity
        method: "select",
        fieldList: [ // Displaying fields
          "ID",
          "name"
        ]
      },
      masterFields: ["ID"],
      detailFields: ["department"]    // Associated field
    }
  ]
};
Form methods #
Make the RequestDate field on the req_reqList form filled current date and read-only.
On the METHODS` DEFINITION section add following code.
exports.formCode = {
  initUBComponent: function () {
    var me = this;
    me.getField('reqDate').setValue(new Date());
    me.getField('reqDate').readOnly = true;
  }
}
Save and check if scripts work correctly.
Adding a filter to the drop-down list #
Reference to the documentation: http://docs.sencha.com/extjs/4.2.2/#!/api/Ext.util.Filter-cfg-filterFn
Now you need to add filtering to the drop-down list of SubDepartments relative to the Department's list so that the user sees only the associated rows.
To do this, we use the onDepartChanged event listener. Add it to the existing req_reqList form code.
exports.formCode = {
  initUBComponent: function () {
    var me = this;

    // Add filter
    me.getField('department').addListener('change', me.onDepartChanged, me);
  }
};
And here describe the event handler
onDepartChanged: function () {
  var me = this;
  var subDepartField = me.getField('subDepartment');

  subDepartField.setValue(null);
  subDepartField.getStore().filter(new Ext.util.Filter({
    id: 'toDocumentIDFilter',
    property: 'department',
    exactMatch: true,
    value: me.getField('department').getValue()
  }));
  subDepartFieldCombo = this.getUBCmp('attrSubDepartment');
}
Loading and displaying documents in the form. Create a file storage #
The entity req_reqList has the attribute reqDoc, which is responsible for the ability to attach to the application a digital document.
To store documents for the project create a new repository
in the blobStores section of ubConfig.json add a new description of the store
{
  "name": "attach",             // Unique blobStore name.
  "path": ".\\docs\\attach\\",  // The path to store root folder
  "storeSize": "Medium",        // Approximate number of files to store. Simple = up to  10000
  "isDefault": false,           // Is this store default for application
  "historyDepth": 2             // Number of stored versions
}
To create a store on the file system execute the command
ubcli createStore
To add a document to the form, go to INTERFACE'S DEFINITION of the req_reqList form.
Add the following code there, placing it as a last element of items.
{
  attributeName: "reqDoc",
  expanded: true,            // Show on form
  height: 200,
  layout: 'auto',            // Auto width
  contentTypeMapping: {'image/jpeg': 'UB.ux.UBImg'}
}
More information about the properties of documents on the client side is available here:
https://unitybase.info/api/adminUI/#!/api/UB.ux.UBDocument
Create a request and check the operation of all functions.