Integration with external API #
Sending requests #
Let's say you need to get data from some API.
The basic code of sending a request and getting data from it using http.request package can look something like this:
const http = require('http')
const req = http.request({
    URL: 'API_ENDPOINT,
    method: 'GET',
    sendTimeout: 1000, receiveTimeout: 30000, connectTimeout: 1000,
    keepAlive: true,
    compressionEnable: true,
    headers: {}
  })
  const resp = req.end()
  const userData = JSON.parse(resp.read('utf-8'))
Now let's look how to use it with UB.
We will create a method that sends a request to https://jsonplaceholder.typicode.com/users API, gets data, parses it, and stores it in the database.
And all this will be called by clicking on the custom button that we will create.
First, we need to create a new meta file req_user.meta, with following code:
{
  "caption": "Users", // entity name
  "description": "users",  // entity description
  "attributes": [
    {
      "name": "name",
      "dataType": "String",
      "size": 255,
      "caption": "User Name",
      "description": "User Name",
      "allowNull": false
    },
    {
      "name": "email",
      "dataType": "String",
      "size": 255,
      "caption": "User Email",
      "description": "User Email",
      "allowNull": false
    },
    {
      "name": "phone",
      "dataType": "String",
      "size": 255,
      "caption": "User Phone",
      "description": "User Phone",
      "allowNull": false
    },
    {
      "name": "website",
      "dataType": "String",
      "size": 255,
      "caption": "User Website",
      "description": "User Website",
      "allowNull": false
    }
  ],
  "mixins": { // the mandatory section (can be empty)
    "mStorage": {
    }
  }
}
Then, create req_user.js file with the code below:
const UB = require('@unitybase/ub')
const http = require('http')
const me = req_user
me.entity.addMethod('addUsers')

me.addUsers = function (ctx) {
  // send request
  const req = http.request({
    URL: 'https://jsonplaceholder.typicode.com/users',
    // host: host,
    // port: port,
    // path: path,
    method: 'GET',
    sendTimeout: 1000, receiveTimeout: 30000, connectTimeout: 1000,
    keepAlive: true,
    compressionEnable: true,
    headers: {} // {Authorization: 'Basic ' + 'QURNSU46MTIzNDU2'}
  })
  const resp = req.end()
  if (resp.statusCode !== 200) {
    ctx.mParams.result = false
    return
  }

  const userStore = UB.DataStore('req_user')
  // get data from response
  const userData = JSON.parse(resp.read('utf-8'))
  // insert data to db
  userData.forEach(user => {
    userStore.run('insert', {
      execParams:
        {
          name: user.name,
          email: user.email,
          phone: user.phone,
          website: user.website
        }
    })
  })
  ctx.mParams.result = true
}
Run the server. (Don't forget to Generate DDL before it)
Go to Shortcut creation panel and create one with the following parameters:
Desktop: City RequestsShortcut caption: UsersCode: req_userSource code:
{
  "cmdType": "showList",
  "cmdData": {
    "params": [{
      "entity": "req_user",
      "method": "select",
      "fieldList": [
        "*"
      ]
    }]
  },
  "customActions": [{
    "actionText": "Add users",
    "glyph": 61465,
    "text": "Add users",
    "handler": function(cmp) {
      $App.connection.run({
        entity: 'req_user',
        method: 'addUsers'
      }).then(function(result) {
        if (result) {
          $App.dialogInfo('Завантажено успішно')
        } else {
          $App.dialogInfo('Під час завантаження сталася помилка')
        }
      })
    }
  }]
}
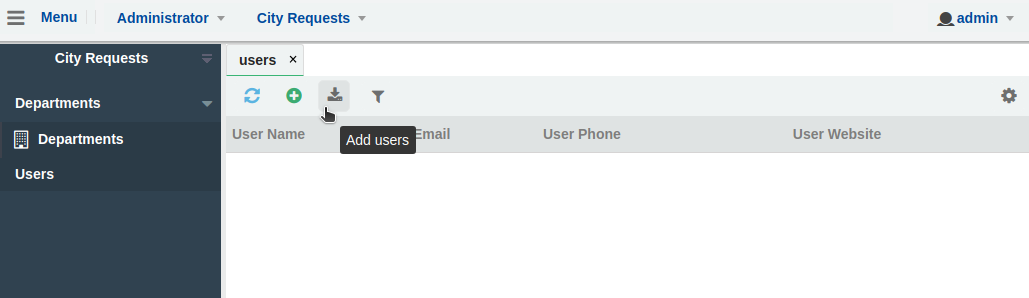
In the source code in customActions section, we added a button with the handler which calls addUsers method from req_user.js.
NOTE
❗ The syntax checker for source code can produce errors. You can ignore them.
Now, you can see the button in Users Shortcut:
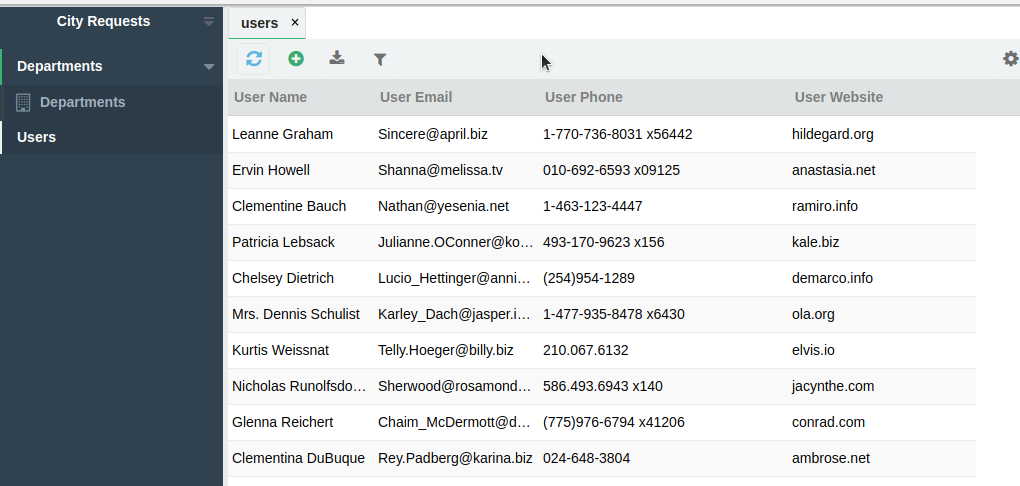
The result of adding users:
Receiving requests #
If you want to receive requests on some endpoint in your app,
you must register this endpoint and set a handler for it by the registerEndpoint method:
const App = require('@unitybase/ub').App
App.registerEndpoint('addUser', addUser, false)
- The first parameter is endpoint literal. (In this example requests on
http://localhost:8881/addUserwill be handled) - The second parameter is a handler function
- The third parameter is whether required authentication headers
Get data from a query string #
The following code shows how to parse user fields from the query string and insert them to the DB:
const UB = require('@unitybase/ub')
const App = require('@unitybase/ub').App
const querystring = require('querystring')

App.registerEndpoint('addUser', addUser, false)

function addUser (req, resp) {
  const { name, email, phone, website } = querystring.parse(req.parameters)
  const userStore = UB.DataStore('req_user')
  userStore.run('insert', {
    execParams:
      {
        name,
        email,
        phone,
        website
      }
  })
  resp.statusCode = 200
  resp.writeEnd('user addded')
}
Add this code to the addUserEndpoint.js file.
Also, add a line require('./addUserEndpoint') to the req.js file.
After restarting the server you can add users by making requests to http://localhost:8881/addUser.
For example:
http://localhost:8881/addUser?name=Andrey&email=abd@ab.com&phone=3849530463&website=kao.in.ua
If all done correctly you will see something like this:


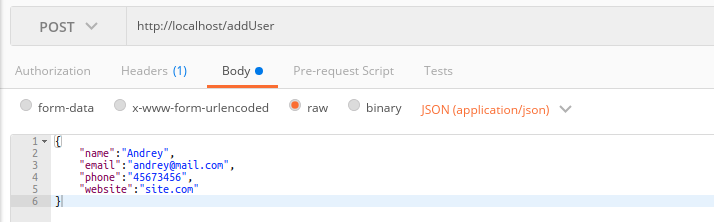
Get data from a request body #
You can use req.read() to get data from a request body.
In this case, the addUser function will look like this:
function addUser (req, resp) {
  const { name, email, phone, website } = JSON.parse(req.read())
  const userStore = UB.DataStore('req_user')
  userStore.run('insert', {
    execParams:
      {
        name,
        email,
        phone,
        website
      }
  })

  resp.statusCode = 200
  resp.writeEnd('user addded')
}
You can check the result with Postman: